- Jul 28, 2020
 0
0- by A2 CMS Team
Once you’ve successfully installed WordPress on your chosen webhost, you’re almost ready to start creating content. However, your WordPress dashboard may look a little complicated at first glance. Fortunately, this feeling doesn’t last very long.
The WordPress dashboard is designed to make the process of creating and managing your website’s content easier. With the right knowledge of where to find the key features you’ll need day to day, you’ll be well on your way to becoming a WordPress dashboard master.
In this post, we’ll ease the learning curve by taking you on a complete tour of the default WordPress dashboard. We’ll also show you how to take advantage of some of the most important features available. Let’s get started!
An Introduction to the WordPress Dashboard
By default, your WordPress dashboard is visually divided into three areas: the left-hand Sidebar, the Admin Bar at the top, and the Information Hub in the center.
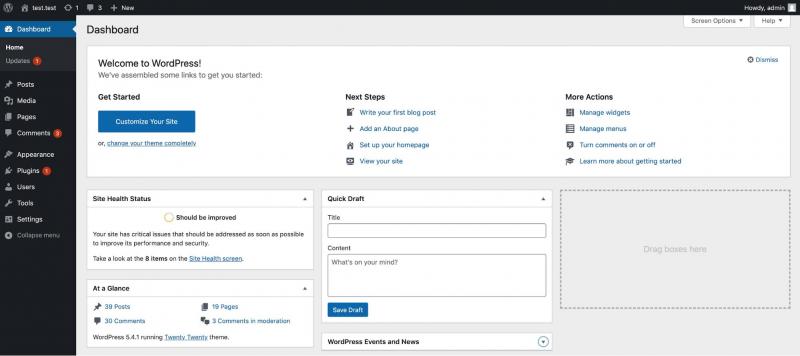
We’ll go through each of these sections one by one, then take a look at other areas you’ll come across.
The Navigation Sidebar
This is the one section of your dashboard you’ll likely be interacting with the most. Practically every WordPress option is accessed through the sidebar.
You’ll also find that many of the options here have nested menus and other selectable links. As such, regardless of what you want to achieve with your WordPress site’s administration, the navigation sidebar will be the answer.
The Administrative Toolbar
The administrative toolbar is another fundamental component of the default WordPress dashboard, although one you may only use infrequently. Out of the box, it sports four icons on the left and another on the right. From left to right, the icons let you:
- Access WordPress-related documentation, support, and more.
- Toggle between the back end and front end of your website.
- Handle comments for your posts and pages.
- Add new content including posts, media, pages, and users.
- Access your profile’s settings.
Provided you’re logged into your admin account, the toolbar at the top remains on every page of your site, including the front end (although only visible to you.) However, you may see other layouts depending on the exact content you’re viewing and the plugins you’ve installed.
The Information Hub
This section covers most of the screen, and helps you to fully take control of your site. As you’d imagine, the information displayed here changes constantly depending on the selected feature in the navigation sidebar.
The first time you log into your account, you’ll be greeted by a default welcome message and other useful tips to help you get started. Installing new plugins or themes can sometimes display a welcome page here too.
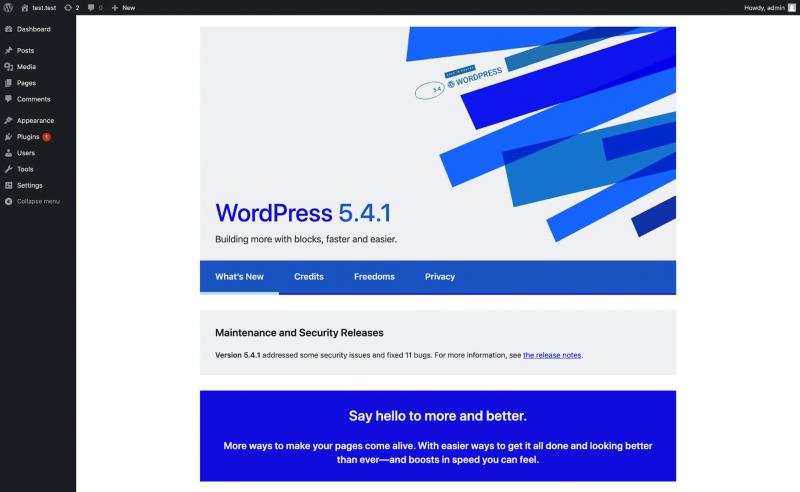
There’s much more to the WordPress dashboard than these three screens. As such, let’s find out what else lurks within.
A Complete Guide to Navigating Your WordPress Dashboard
For easy navigation, we’ll break down this dashboard tour into sections related to the main elements of your site. Let’s start with arguably the most important.
Posts, Pages, and Media
These three features are the main elements that let you add and edit the content on your website. One of the biggest advantages of using WordPress is the highly simplified process of creating posts and pages.
In order to gain access to your site’s posts, simply hover the mouse over the Posts tab in the navigation sidebar. You’ll immediately see a drop-down menu containing All Posts, Add New, Categories, and Tags options.
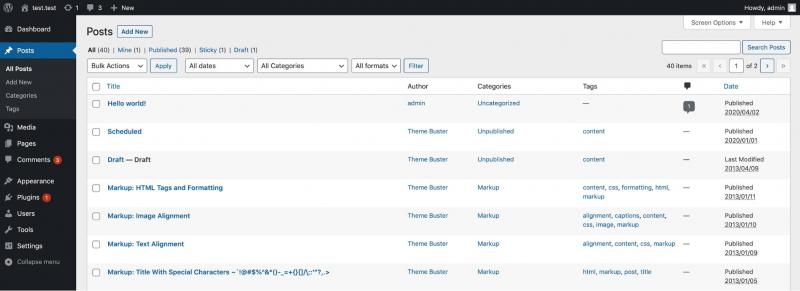
By clicking on All Posts, the dashboard shows you a list of every post on your site – published posts, drafts, and even those in the trash. Hovering over a particular post will display a quick menu that lets you view, edit, or trash the post:
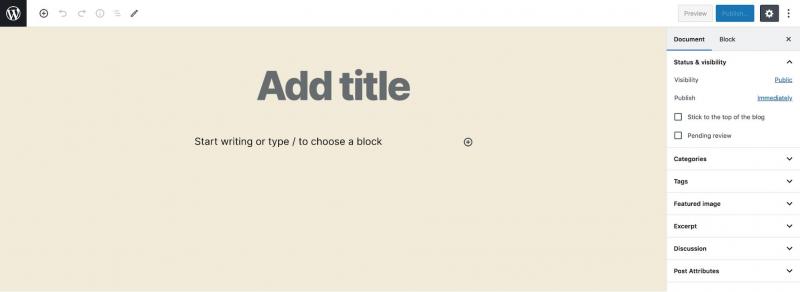
The Add New button redirects you to a fresh Block Editor page, read to create new content:
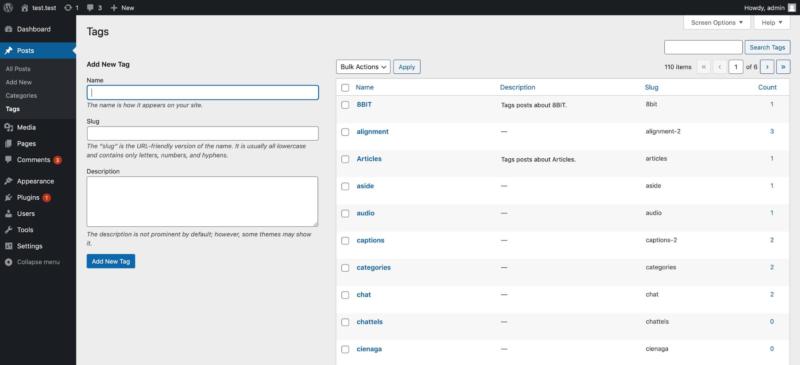
The Categories and Tags pages let you create and manage the taxonomies you’re using on your site:
The process of creating and editing pages in WordPress is very similar to that of posts, in that you’ll hover over the Pages tab in the navigation sidebar, and click on either the All Pages or Add New button.
While the All Pages and Add New options achieve the same things as the Posts menu, you’ll find no taxonomy screens here, as pages don’t use them.
Finally, under the Media menu, you can either navigate to the Library or Add New media. The Media Library (or just Library) holds all of your site’s media files:
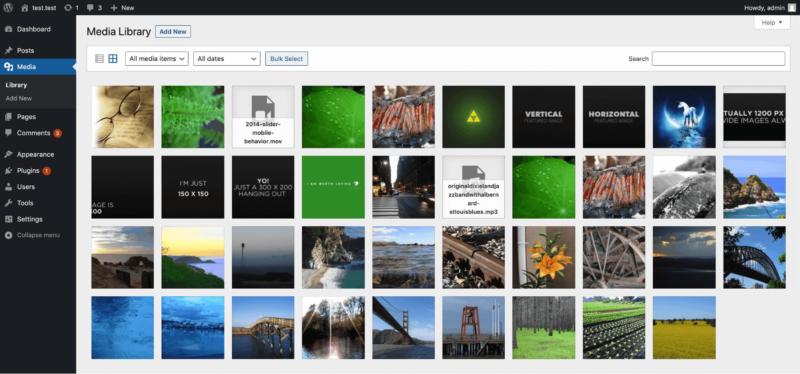
If you dig into the ‘per-image’ options, you’ll also find some decent media editing options right within the dashboard.
As you’d expect, the Add New tab lets you upload media files using either a multi-file or browser-based uploader.
Appearance and User Management
As you may already know, WordPress lets you tweak your site’s appearance to taste using the Appearance tab. There are plenty of options and additional menus here.
For starters, the Themes section lets you activate, customize, and remove themes that have been installed on your website. You can also install any of the thousands of free themes available in the WordPress Theme Directory:
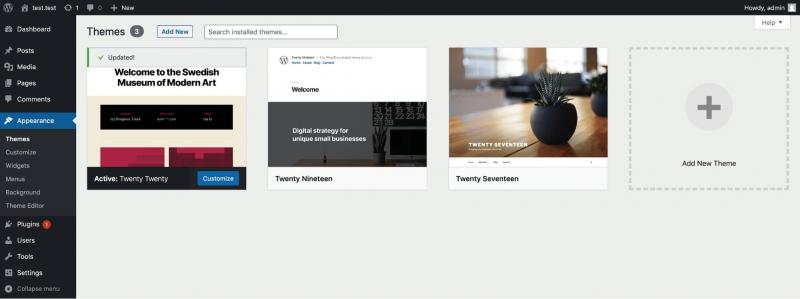
By clicking on Customize, you’re taken to the default Live Customizer. This is a simple editor designed to help you edit almost any aspect of your site’s appearance, depending on the options you’ve been granted by the developer:
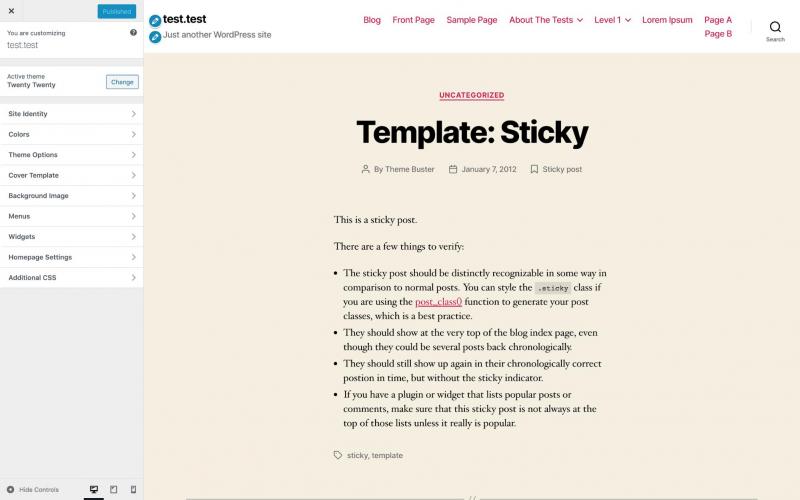
You’ll notice options to edit your widgets, menus, and background here. However, you can also achieve this via the dedicated pages in the Appearance menu.
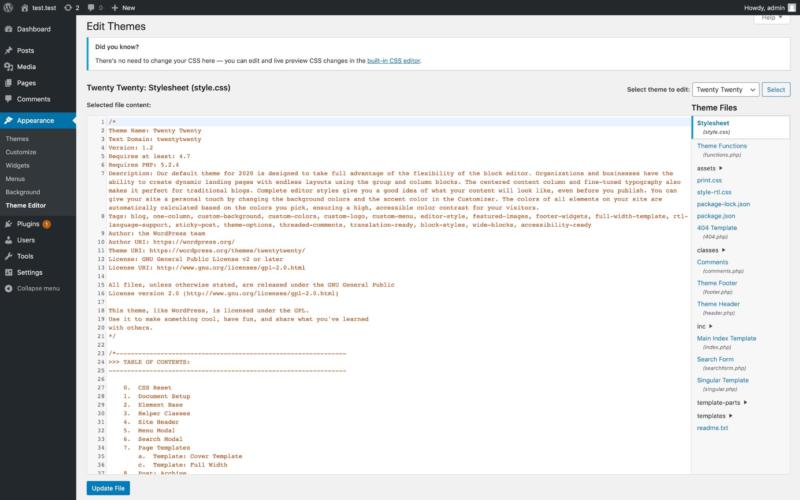
If you have coding knowledge, the Theme Editor lets you edit any of your themes’ files using CSS:
The Plugins screen offers a list of your currently installed plugins, with the option to Activate, Trash, and more:

You’ll likely be on this screen a lot, so it’s worth taking some time to navigate around and see how you can get developer information from here, and also access individual plugin settings too.
With the Users tab, you can add or edit site users, and assign them different access privileges (such as an Administrator, Subscriber, Contributor privileges, and more):
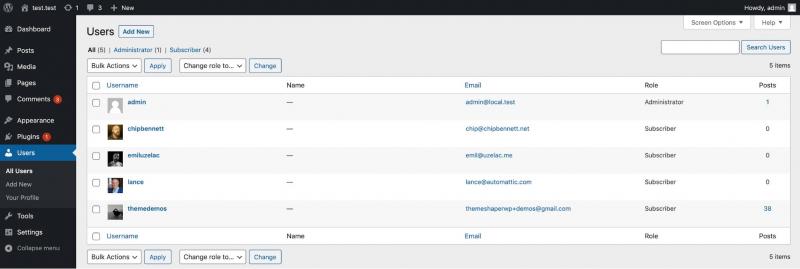
They’re practically similar to your own personal profile options found in the admin bar at the top of the screen.
Settings
The Settings tab grants you extra control over other important aspects of your site, and it’s one of the first you’ll want to access when setting up a new site.
The General settings page includes your site title, tagline, language, date, and time settings – basic site fundamentals, in other words:
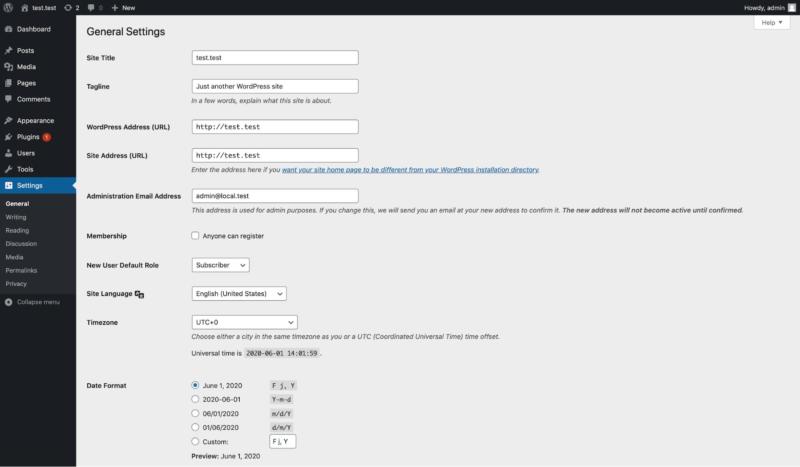
The Writing, Reading, and Discussion tabs let you change settings such as default post taxonomies, what content your home page displays, myriad settings for post comments, and much more. Looking into this is slightly beyond the scope of this article, although we’ve discussed some of these aspects in the past.
In the Media tab, you’ll find settings for how images are presented and saved, along with the option to define custom dimensions for your different sized images:
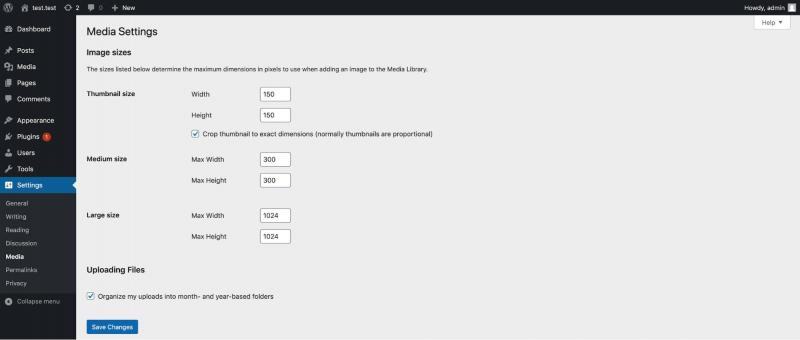
The Permalinks tab is another you’ll visit right off the bat, but may not touch too often. It basically lets you set ‘pretty permalinks’, along with some advanced options:
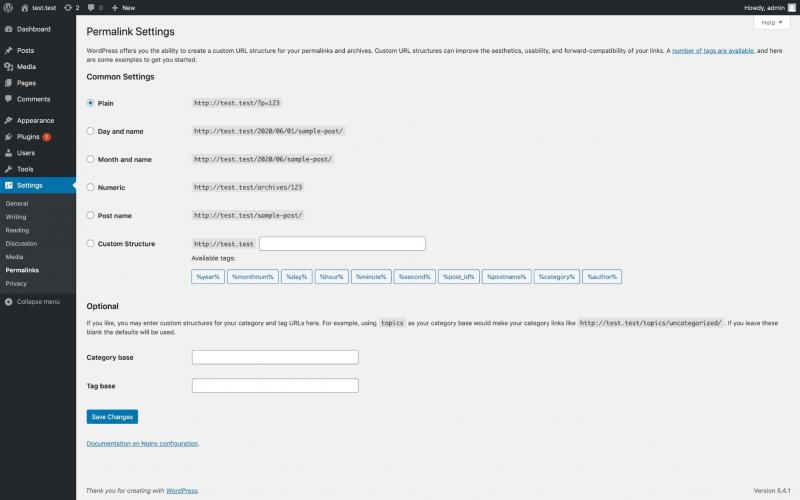
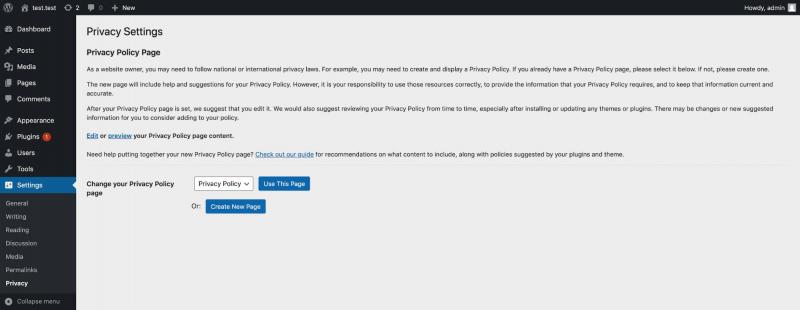
Finally, the Privacy settings let you set a privacy policy for your site, either by using a dedicated page, or a WordPress template.
Note that you’ll also see additional tabs and panels on your WordPress dashboard depending on the plugins and themes you install. Though, as far as basic functionality goes, this should keep you busy!
Conclusion
WordPress is rich with useful features that significantly enhance the process of content creation. It’s one of the most prominent selling points of the platform, after all. This is highlighted by the dashboard you’re greeted with once logging in.
There are a plethora of options within these screens, so much so you could tinker almost to eternity. However, most users will access only a few screens on a day-to-day basis, meaning that you’ll have the power at your fingertips, without having to immerse yourself in overwhelming options.
Image credit: noelsch.

