- Jul 21, 2020
 0
0- by A2 CMS Team
There are many tools available to help you optimize your WordPress website. However, the platform also includes some often overlooked native features that can assist you in this endeavor.
WordPress’ Site Health feature has been out for over a year now, but has largely been overshadowed by news about the Block Editor. If you know where to find it and how to use it, this handy tool can provide key insights and suggestions on how to improve your site.
In this post, we’ll provide an overview of the WordPress Site Health feature. Then we’ll explore the top ways it can help you improve your site’s performance and security. Let’s jump in!
An Introduction to WordPress’ Site Health Feature
WordPress’ Site Health feature first appeared in version 5.2, which was released on 7 May, 2019. The goals of this tool are to help users self-service their sites and to assist developers with debugging their projects.
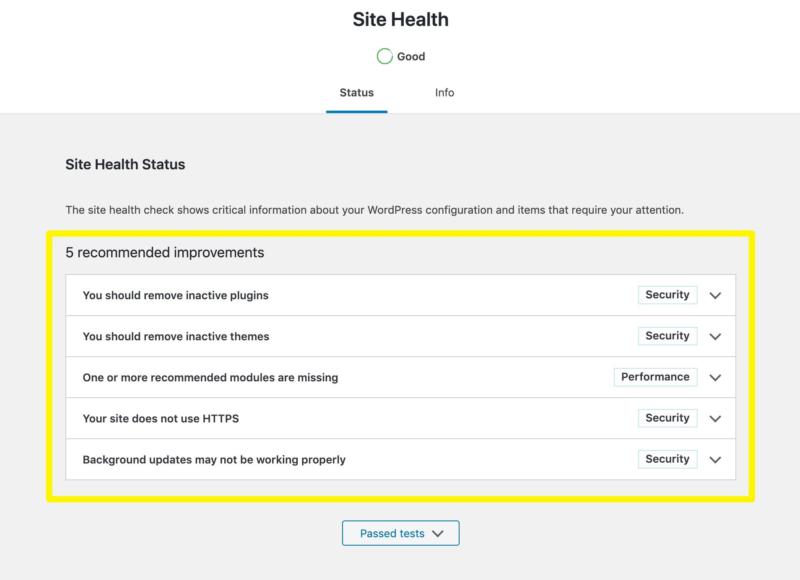
In the Status tab, the Site Health checker assesses your WordPress site’s performance and security using 17 tests. It provides a pass/fail style score of “Good” or “Should be improved” to indicate how well your site is running:
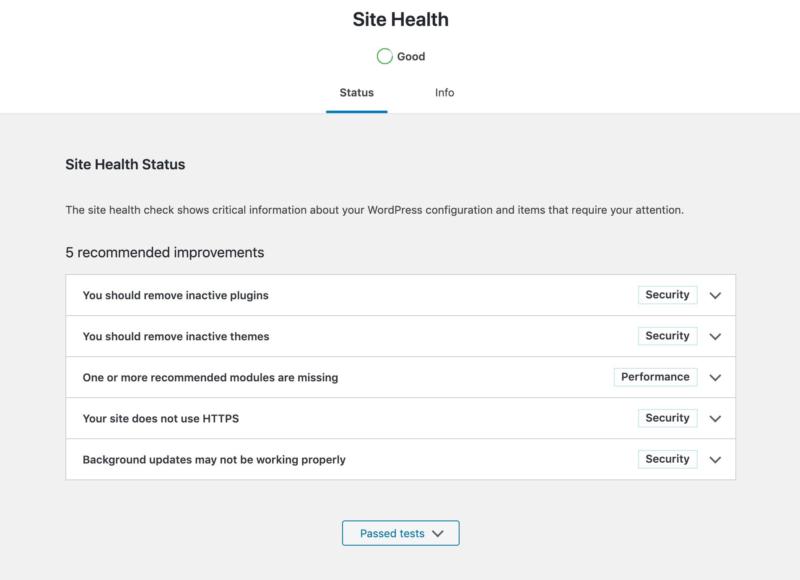
WordPress also shares specific details regarding the tests your site is not passing to help you improve in these areas.
In the Info tab, the Site Health tool lists some key details about your site’s configuration. This page is mostly for developers who are debugging sites:
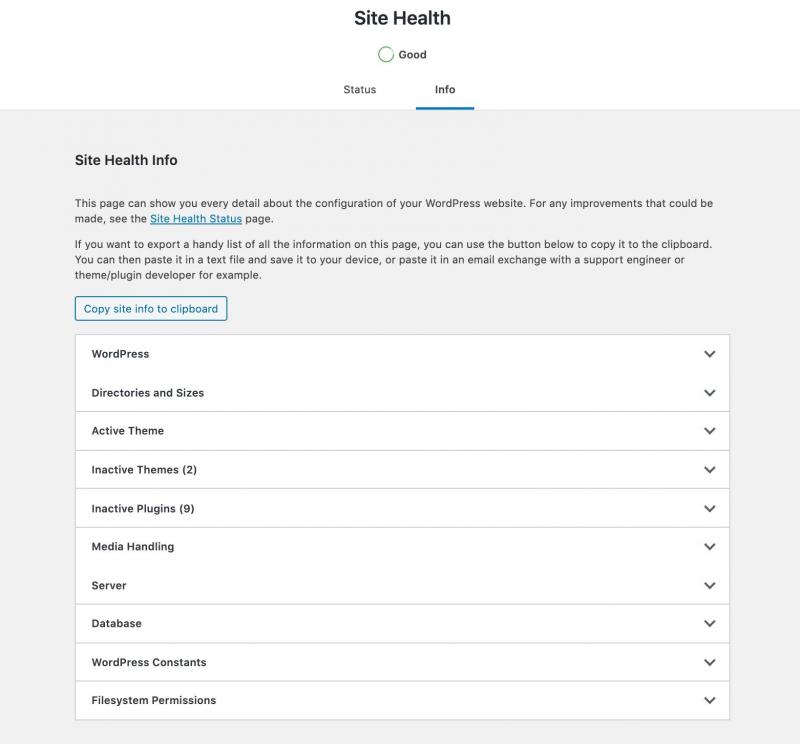
However, it can also come in handy for those who are trying to troubleshoot certain issues or who are conducting thorough security audits of their websites.
How to Use WordPress’ Site Health Feature to Boost Performance and Security (In 3 Steps)
Once you know where to find it, using WordPress’ Site Health feature is pretty straightforward. Below, we’ve outlined the process in three simple steps.
Step 1: Access the Site Health Tool
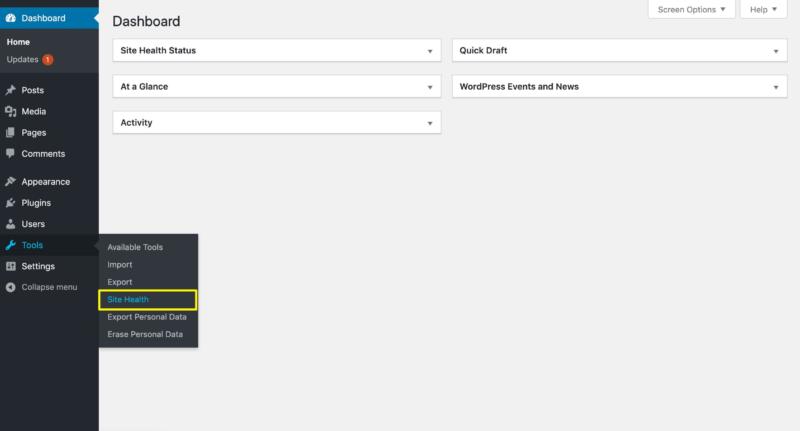
To access the Site Health checker, log into your WordPress dashboard and navigate to Tools > Site Health:
This will take you right to the Site Health feature. You can see your current ‘score’ at the top of the screen:
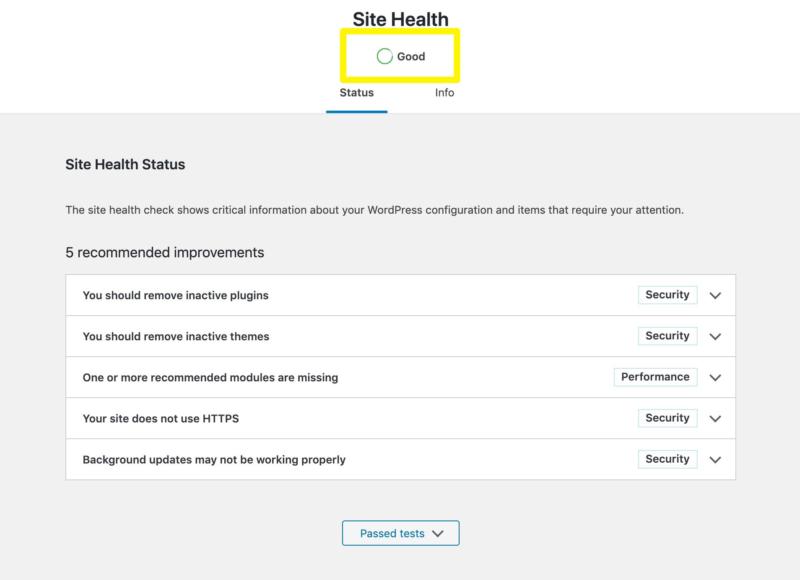
Below that, you can click on Status or Info to switch between the tool’s two tabs.
Step 2: View WordPress’ Performance and Security Recommendations and Follow Them
Most of the Site Health tool’s most helpful features for performance and security optimization are in the Status tab. At the top of this page, you’ll see a list of all the tests your site does not currently pass:
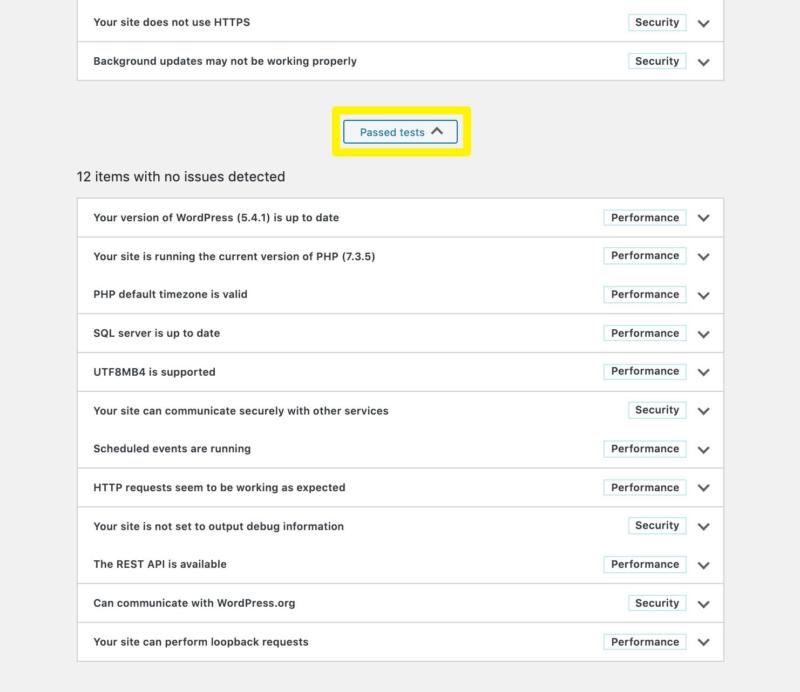
Below that is the Passed tests button, which you can click on to see the areas where your site is already performing well:
For now, you’ll want to focus on any tests listed in the top half of the page. Click on the arrow to the right to expand the section for that test and view WordPress’ recommended course of action:
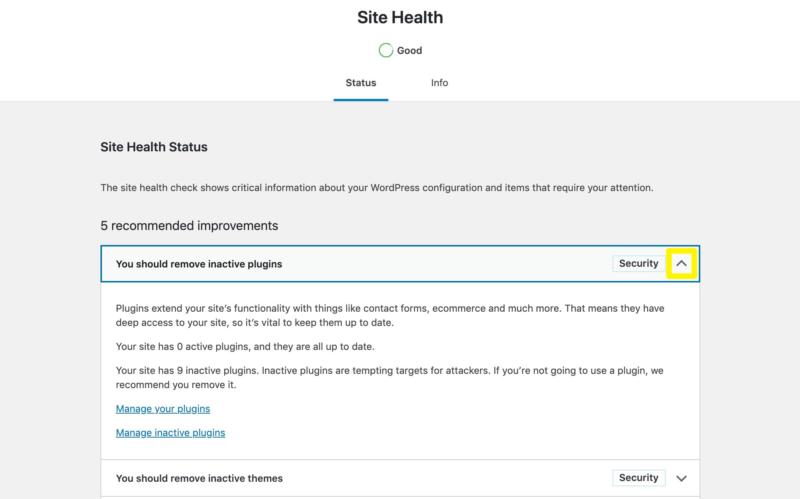
You should follow best practices for performance and security optimization to correct each of these issues and improve your site’s overall health score.
Passing WordPress’ Site Health Performance Tests
WordPress’ Site Health feature should provide some guidance on how to pass its tests. However, if you need a little more information, here’s a quick summary of how to tackle all of its performance-related recommendations:
- Update WordPress core, plugins, and themes. WordPress will notify you when updates become available. You can install them in Dashboard > Updates.
- Upgrade your version of PHP. PHP is the programming language WordPress runs on. You can update your site’s PHP version via your hosting account.
- Make sure WP CRON is enabled. WP CRON is the feature that enables WordPress to schedule events such as publishing posts or running automatic updates. Check with your host to ensure it’s enabled.
- Install recommended PHP modules. WordPress recommends certain PHP modules. Contact your host if any are missing.
- Use the latest version of MySQL. It’s important to keep your SQL database updated for performance and security reasons. This will also ensure the UTF8MB4 character set is supported. Contact your host if your SQL server is outdated.
- Use the PHP default timezone. WordPress uses PHP’s default timezone to display local times. Do not change this setting. Troubleshoot for a plugin conflict if you’re seeing a notification about it and haven’t touched this setting.
- Enable the REST API. The REST API powers the Block Editor and other key WordPress features. Contact your host or reset your .htaccess file if it’s not working.
These solutions should enable you to pass all the Site Health performance tests.
Passing WordPress’ Site Health Security Tests
Here are a few key tasks to help you pass all of the Site Health security tests:
- Remove inactive plugins/themes. The more code your site contains, the more chances there are for hackers to gain access to it. Delete inactive plugins and themes to remove excess code.
- Use HTTPs. It’s important to encrypt sensitive user information on your site. To do so, install an SSL certificate.
- Turn off debug mode. Debug mode helps developers pinpoint issues in their code, but can also show vulnerabilities to malicious parties. Turn it off in your wp-config.php file.
- Enable auto-updates. Auto-updates are important for installing security patches as quickly as possible. Make sure they’re enabled in your wp-config.php file. Troubleshoot for a plugin conflict if this notification persists.
- Rule out DNS errors. Your site must be able to communicate with WordPress.org to run updates and enable certain plugins and themes to work. Check with your host to see if your server is experiencing a DNS error if you’re experiencing trouble in this area.
Carrying out these suggestions will help improve your Site Health score and protect your site.
Step 3: Check Your Site’s Filesystem Permissions
Although the Info tab is primarily for debugging, there is one section on this page you might want to consider from a security standpoint. Your Filesystem Permissions indicate whether WordPress is able to make changes to certain files that make up your site:
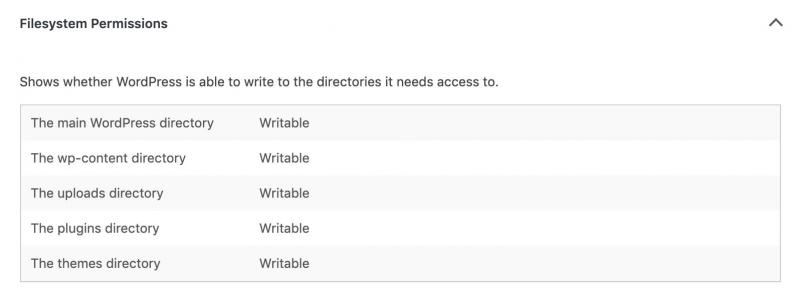
Expand this section and check to make sure each line says Writable. This is important for enabling WordPress to run updates, which is a key security best practice.
Conclusion
While there are many tools available to help you optimize your WordPress installation, the native Site Health feature is a smart place to start. It provides insights into several key performance and security concerns, including some you won’t find elsewhere.
You can use the Site Health tool to improve your site in just three quick steps:
- Access the Site Health feature by navigating to Tools > Site Health.
- View WordPress performance and security recommendations and follow them.
- Check your site’s filesystem permissions to ensure updates can run properly.
Image credit: Unsplash.


