- Dec 17, 2018
 0
0- by A2 Marketing Team
If you’ve purchased a domain through WordPress.com, you may have noticed that your account comes with up to five custom email addresses (such as [email protected]). However, there’s no associated inbox. This means that unless you set up a domain forward, your emails will have no place to go.
Fortunately, you can connect your domain to an email inbox using A2 Hosting. This way, you can receive and answer emails using your custom addresses. It’s very simple to set up an email inbox, and using your own domain makes your messages appear more professional and authentic.
In this post, we’ll explain how to set up your A2 Hosting inbox, which is included for free in all of our hosting accounts, and connect it with your WordPress.com domain. Let’s go!
Why You Should Use a Custom Domain for Your Email Inbox
A custom email domain is an address that includes your site’s or business’ name, such as [email protected]. Using a custom email address is vital, since in the digital age your company’s emails are a key part of its overall branding.
As a business owner, you probably already know not to use an obviously unprofessional email address such as [email protected]. However, even if you use a professional name, it may hurt your brand’s image to include a generic ending. Default extensions such as @gmail.com, @yahoo.com, or @aol.com make it obvious that you’re using a free email address.
On the other hand, a custom domain indicates that you went the extra step to secure a professional inbox. It also helps to show that your messages are authentic. Since anyone can set up an address with a name like [email protected], customers may wonder whether the email came from someone at your company, or if it’s actually spam.
Fortunately, it’s easy (and free!) to set up an email inbox for your custom domain if you already have an A2 Hosting plan. If you purchased your domain name with another company, such as WordPress.com, you can even set up that domain to forward to your A2 Hosting inbox.
How to Connect Your WordPress.com Custom Domain Email to A2 Hosting (In 3 Steps)
Now, let’s go over how to connect a WordPress.com email domain name to A2 Hosting. This process should only take a few minutes to complete.
Step 1: Create an Inbox in Your A2 Hosting Account
First, you’ll need to set up an email inbox. You can do this in your A2 Hosting control panel. Most plans come with an unlimited number of inboxes, but let’s start with one for now.
To begin, navigate to the Email section of your control panel and click on Email Accounts:

Enter the name of the account you’d like to create into the text box, along with a password:
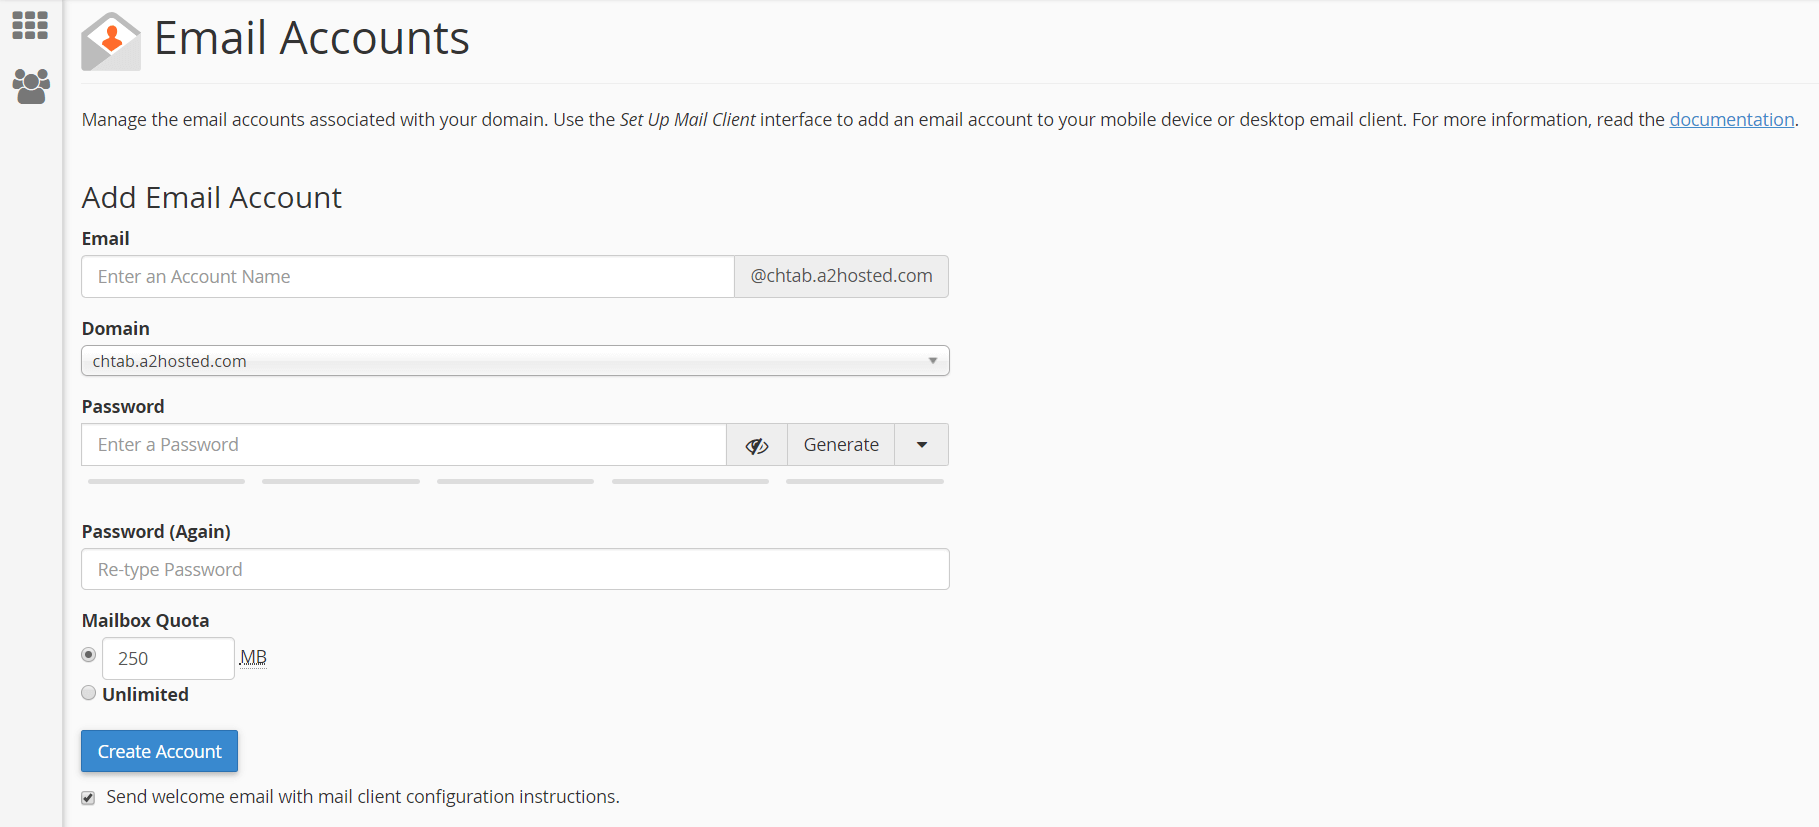
Under Mailbox Quota, choose the size for your email account (you can select Unlimited if your account includes that option). Then, click on Create Account.
Step 2: Connect Your Domain Name to Your Hosting Account
The next step is to connect your WordPress.com domain name to your A2 Hosting account. Log into your WordPress.com account, and locate your domain name information by visiting My Site > Domains:
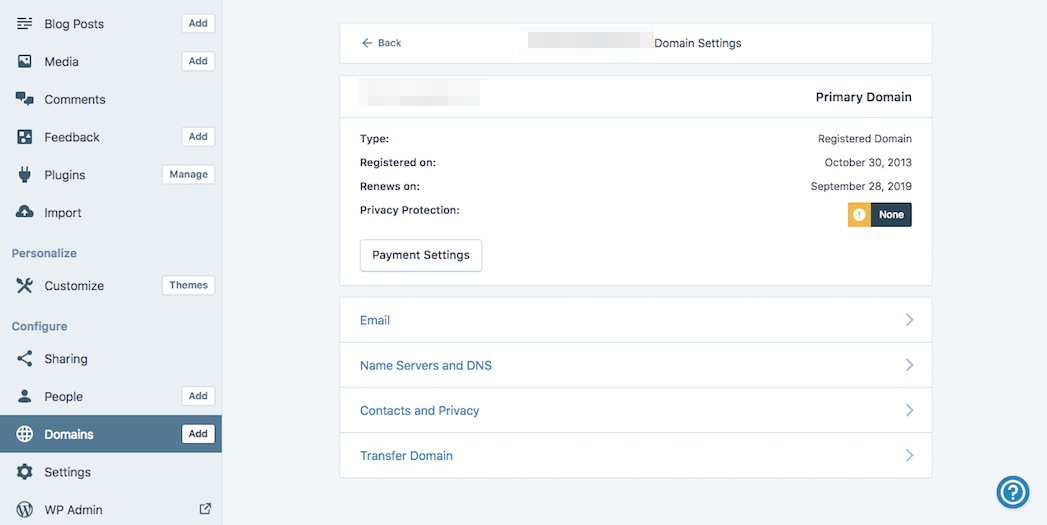
Next, you can set up an email forward. Choose the Email tab, scroll down to the bottom, and choose Email Forwarding:

Then, select the option to Add New Email Forward. In the dialogue box that appears, enter the custom email address you’d like to use, and choose the A2 Hosting email you just set up as the “forwards to” address:
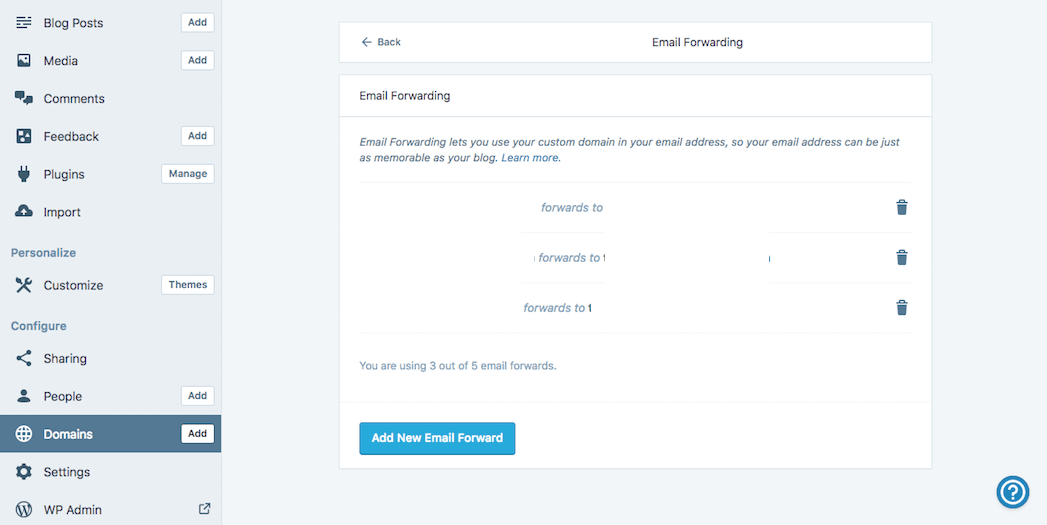
This will direct WordPress.com to forward messages from your email domain to your A2 Hosting account. After that, you can add as many accounts as you need by simply repeating this process.
Step 3: Transfer Your Domain (Optional)
WordPress.com only enables you to add up to five email accounts for free. Additionally, you can only receive (not send) emails from your custom domain using an email forward like the one described above. To send emails using WordPress.com, you would need to pay an extra fee.
If you want to avoid these limitations, you can always transfer your domain to A2 Hosting. On your A2 Hosting plan, you can create unlimited inboxes – which means you can have as many custom email addresses as you’d like. Plus, you can receive and send messages using all of them.
To prepare for a domain transfer, you can return to My Site > Domains in your WordPress.com account, and locate your domain. Then, choose Transfer Domain from the bottom of the list:
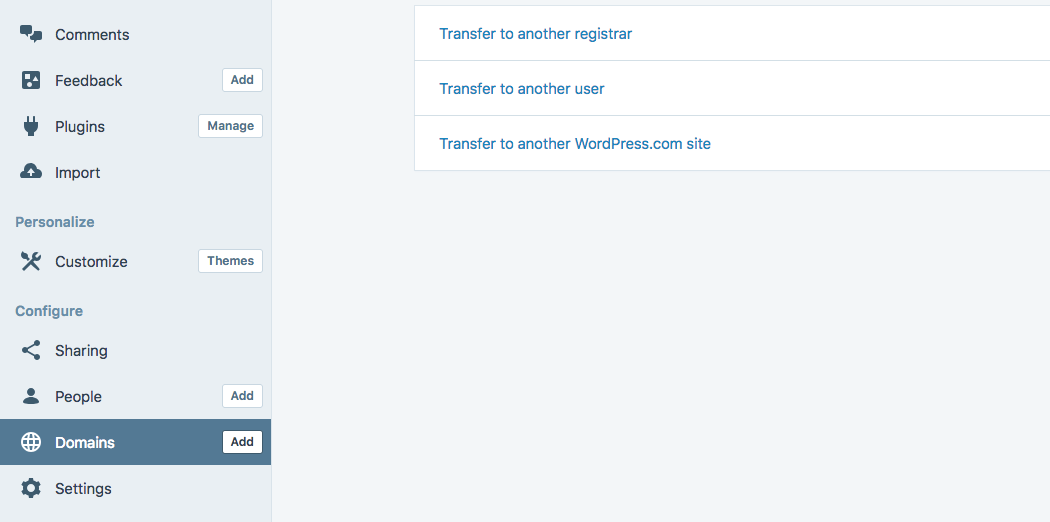
Next, choose Transfer to another registrar. Click through the dialogue boxes to unlock your domain. Then, you’ll want to check out our domain transfer guide:
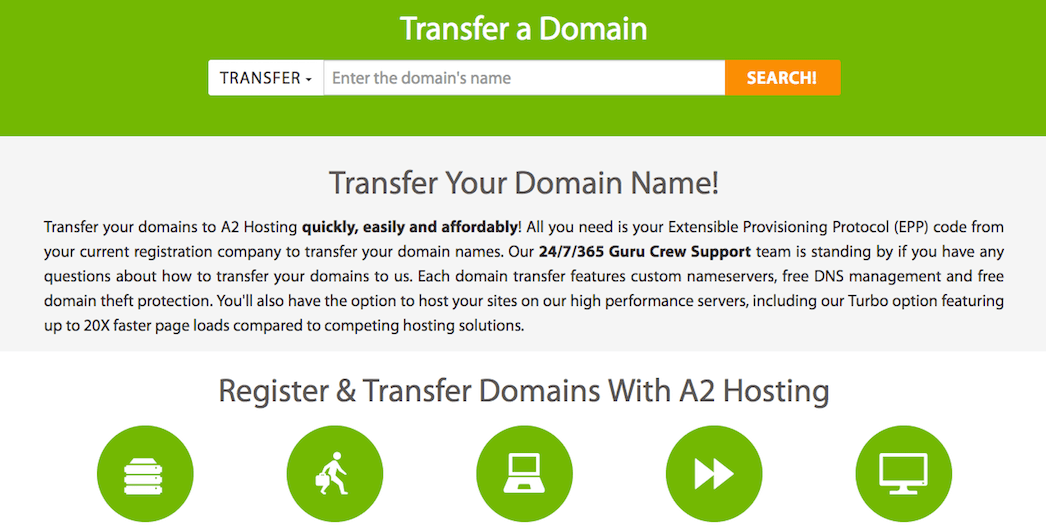
Simply search for your domain name, and an A2 Hosting Guru Crew member will be ready to assist if you need help transferring it over.
Conclusion
These days, a custom domain email is not just a sign of professionalism, it’s an expectation. If you communicate with your customers from a unique email address, they can be sure that each message actually came from your company.
At A2 Hosting, all of our plans, including our own WordPress solutions, come with free email inboxes. Even if you purchased your domain from WordPress.com, you can still connect your custom email address by following these simple steps:
- Create an inbox in your A2 Hosting control panel.
- Connect your custom domain name to your A2 Hosting account, using an email forward.
- Optionally, you can transfer your WordPress.com domain to A2 Hosting. This way, you can have as many email addresses and associated inboxes as you’d like, at no extra cost.
Image source: Pexels.


