- Jan 07, 2020
 0
0- by A2 Marketing Team
Uploading images to your website is simple. However, not all images are ready for the web out of the box. If you want to make sure you’re providing a great user experience, there are a few things you’ll need to take care of before you upload any media to your site.
Optimizing or compressing your image files, for example, can help bring loading times down. This makes for a smoother navigation experience. Ideally, you’ll want to have a checklist of what actions to take for each image you use on the web, so you don’t miss anything.
In this article, we’ll talk some more about why it’s important to optimize your images for the web. Then we’ll go over our three-point checklist to making sure your images are ready to go. Let’s get to it!
Why You Need to Optimize Your Images for the Web
Optimizing your images for the web doesn’t mean taking better screenshots or pictures (although that can’t hurt). Instead, it means making sure that the images you use don’t impact the user experience negatively.
Some ways that images can cause problems include:
- Having massive file sizes. Large files can slow down loading times dramatically.
- Using the wrong resolution. If your visitors have to zoom in or out to make sense of an image, it takes away from the flow of their experience.
- Having images of different qualities. If one image looks perfect and another is blurry, that indicates a lack of consistency in your editorial process.
Overall, optimizing your images for the web is all about attention to detail and consistency. If you make a small list of optimizations that you’ll carry out for each image, the process can becomes second nature in no time. More importantly, it helps you ensure that your images are always on point, which makes your website look much more professional.
3 Tips for Getting Your Images Ready for the Web
Getting your images ‘ready for the web’ isn’t as time-consuming as you might think. Most of the work happens before you upload images to your website. Here are four steps for preparing and optimizing your images effectively.
1. Choose a Standard Image Format for Your Website
To keep things simple, it’s best to use one primary image file type for your website. In most cases, the decision comes down to either JPEG or PNG.
JPEG is what’s called a ‘lossy’ file format. When you compress JPEGs, their quality tends to drop. That makes for smaller file sizes (which is good!), but depending on the resolution of your images, it can affect how they look:

JPEG is generally fine for websites if you’re going to be mainly using small images. However, PNG tends to be a safer alternative for many sites, since it’s a ‘lossless’ file format. When you compress a PNG file, the size reduction isn’t as dramatic, but the images retain their quality better:
If your site relies on high-quality imagery, PNGs can be an excellent option. Just be aware that it will be extra important to optimize your images (as we’ll see below).
2. Crop Images to Highlight Important Sections
If you’re going to use images on your site to give instructions or show how something works, you need to be mindful of how you frame them. Let’s say, for example, that you want to teach someone how to find an option using cPanel. If you use this as a reference image, it’s not going to be very helpful:
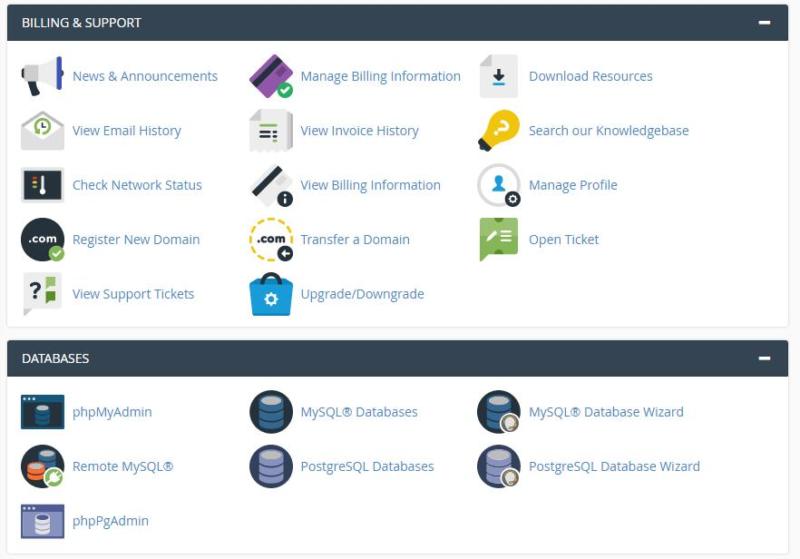
A more focused, cropped image is a much better way for users to zero in on the elements you want them to notice:

Cropping your images not only helps with the user experience, but it also enables you to cut down on file sizes before you optimize them. If you use a lot of screenshots on your website, we recommend picking up a tool that enables you to screenshot only the areas you want.
That way, you have more control over how the images look, and you won’t need to crop them afterward. On the other hand, if you’re dealing with existing screenshots, you’ll need to crop them manually, which is something you can do with any basic image editing tool.
3. Optimize Your Image File Sizes
Image optimization and compression is vital, which is why we’ve saved this process for last. Image compression tools take your pictures and reduce their file sizes, by doing away with superfluous data.
This enables you to preserver most of an image’s quality, while greatly reducing its impact on your site’s performance. To give you an idea of what you can expect, here’s an unoptimized PNG:

Now, here is the optimized version of that same image:

The original weighed 1 MB, while the optimized version only occupies 214 KB. Plus, the two images look nearly identical. In practice, the difference won’t be evident except at massive resolutions.
What’s more, image optimization has a cumulative effect on your website. The more images you compress, the less data your visitors’ browsers will need to load in order to view your site.
You can use a wide variety of tools to optimize your images. We’re big fans of TinyPNG, which supports both PNG and JPEG files. All you have to do is select which images to upload, and the tool does the rest:

With TinyPNG, you can also upload and download images in batches, which makes it easy to optimize large numbers of files quickly.
Conclusion
Preparing your images for the web is easier than you might expect. As long as you check a few important boxes, your images should look pixel-perfect every time. More importantly, you’ll provide a better experience for your website’s users.
To recap, here’s your three-point checklist for ensuring that every image you upload is ready for the web:
- Choose a standard image format for your website (we recommend PNG).
- Crop images to highlight important sections.
- Optimize your image files.
Image credits: TheAngryTeddy, Michael_Luenen, enriquelopezgarre, pixel2013.


