Unmanaged VPS Quick Start Guide
Congratulations and thank you for purchasing an unmanaged VPS package from A2 Hosting! This Quick Start Guide provides the information you need to hit the ground running.
Your A2 Hosting Customer Portal
After you purchase an unmanaged VPS package from A2 Hosting, you receive a Welcome e-mail message that provides information about how to access your account on the A2 Hosting Customer Portal. Your A2 Hosting Customer Portal enables you to view your account's product information, including:
- The VPS domain name
- The VPS IP address
- The installed operating system (OS) template
- SSH account information
- DNS name server information
To find this information, please first log in to the A2 Hosting Customer Portal. It can be found at:
Your new unmanaged VPS space is located under the orange Your Active Products/Services section as shown in the screenshot below:

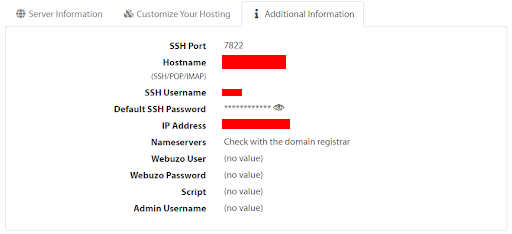
Click anywhere on your unmanaged VPS package. This will take you to the Manage page. The Additional Information tab on the Manage page contains all the technical information you need for your account, like your IP Address and SSH login information:
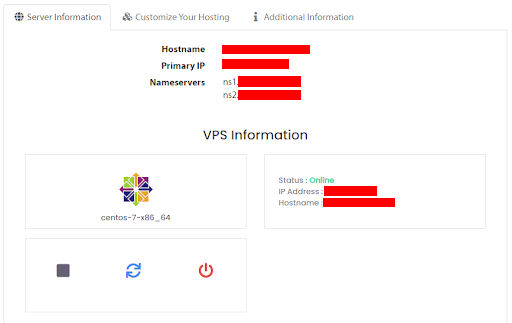
You can control basic aspects of your VPS from the A2 Hosting Customer Portal. After you log in, click My Services, and then click Manage next to your VPS plan. Scroll down to the Server Information tab (alternatively, you can handle some of these actions from the Actions toolbar on the left-hand side.)
Virtualizor Controls
Unmanaged VPS plans have several different areas within the Customer Portal that you can utilize to control your VPS.
Controlling the VPS Power State
The VPS Information section can be found below the Server Information section. This section shows you which OS is installed on your unmanaged VPS, as well as your online status, IP address, and Hostname. From here, you can shut down your VPS (click the red power icon,) start/stop the VPS (click the grey square icon,) or restart your VPS (click the blue reverse icon.)
If you scroll further down, you will find the Overview, Graphs, Settings, Install, and Services tabs.
Overview
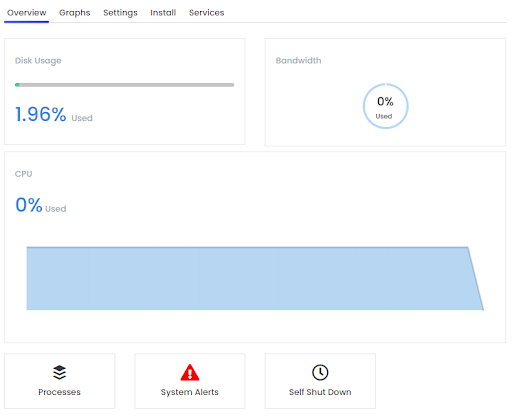
The Overview tab gives you a quick snapshot of the VPS disk usage, bandwidth, and CPU usage, as well as the ability to look at processes, system alerts, and the ability to configure self shut down:
VPS Statistics (Graphs)
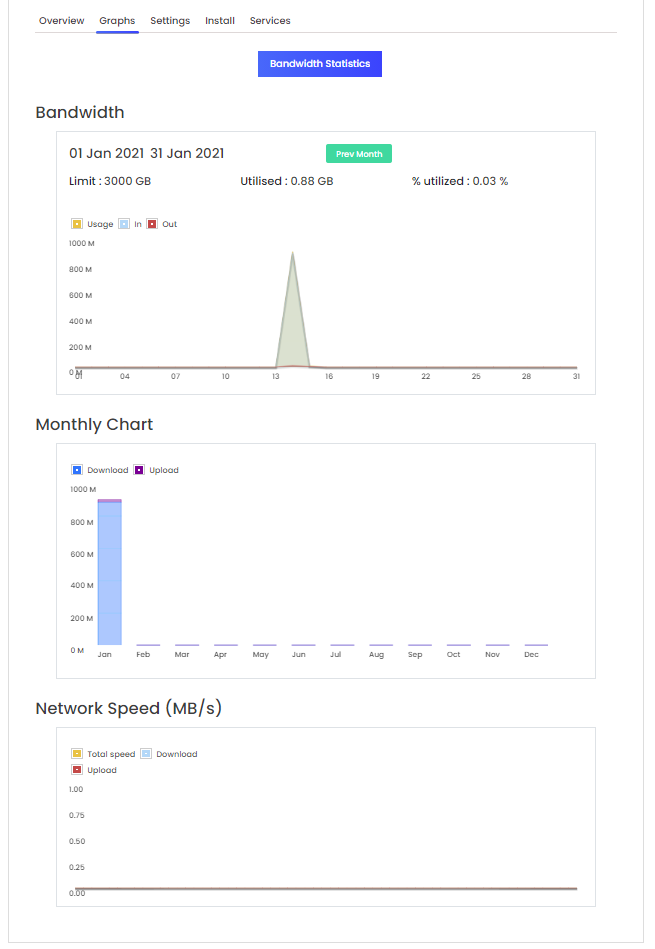
The Graphs tab displays the VPS bandwidth, monthly upload and download chart, and a network speed chart:
Settings (VNC client, password, hostname, etc..)
The Settings tab gives you the ability to change the hostname, change your root password, and more:

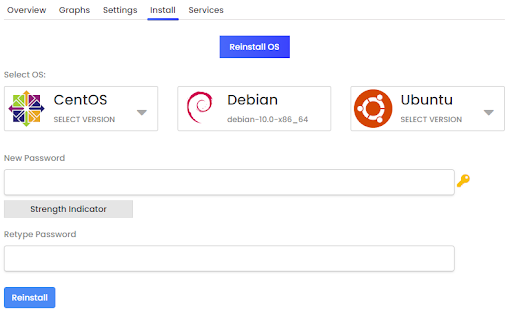
Installing an OS
The Install tab allows you to reinstall an operating system (OS,) or select a different OS. If you would like install or reinstall an OS, please refer to A2 Hosting's knowledgebase article How to Install an Operating System on a Virtualizor Unmanaged VPS:
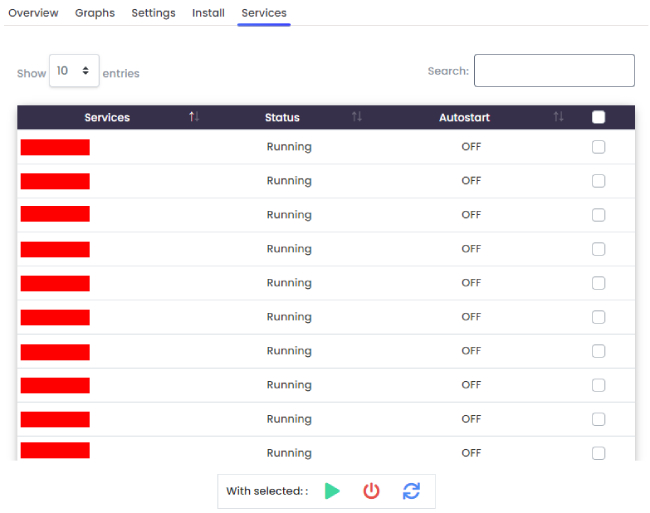
Services
The Services tab allows you to start/stop, restart, and shut down different services on the VPS using the same icons seen in the Overview tab:
For more information about how to use the Customer Portal, please see these articles.
Dedicated IP addresses
Did you know that one of the perks of having an unmanaged VPS hosting account with A2 Hosting is that you can add additional dedicated IP addresses in addition to the one dedicated IP address that comes with your account? If you would like to purchase an additional dedicated IP address, please follow our guide How to order a dedicated IP address. This page in the Customer Portal will take you right to the spot where you can order a dedicated IP address.
SSH
Our How to use SSH article covers the basics of how to get started with using SSH, and our How to access your account using SSH keys article covers how you can deploy a variety of automated processes, such as two-factor authentication and allowing multiple users to transfer files securely using SFTP.
Pre-Installed Applications
When an unmanaged VPS plan is ordered, you have the option to select a pre-installed control panel.
cPanel
cPanel is a fully-featured web-based control panel that enables you to manage your domain through an easy-to-use web interface. Using cPanel, you can manage all aspects of your site, including e-mail, files, backups, FTP, CGI scripts, website statistics, and much more. To access cPanel with your unmanaged VPS, please refer to How to access cPanel with an unmanaged VPS.
For more information about how to use cPanel, please see these articles.
Webuzo
If you have an unmanaged VPS, you can use Webuzo to install a wide range of applications and frameworks quickly and easily. For more information about Webuzo, please refer to How to access and use Webuzo on an unmanaged server.
Domains and DNS
If you purchased a new domain from A2 Hosting or transferred a domain to A2 Hosting, you can use the following name servers for your VPS:
- dns1.name-services.com
- dns2.name-services.com
- dns3.name-services.com
- dns4.name-services.com
To set the name servers, login to the A2 Hosting Customer Portal. Click My Domains, locate the domain, and then click Manage Domain. To set the name servers, click Nameservers. To create DNS Records for your domain, click Management Tools, and then click Manage DNS. You can create an A record that points to your VPS IP address.
If your domain is with another registrar, you must use their DNS management interface.
Configuring Domains
A2 Hosting’s knowledgebase article How to configure a domain for an unmanaged product walks you through how to configure a domain to resolve to your unmanaged server. This article covers both domains registered with A2 Hosting and those registered with a third-party provider.
DNS Propagation
After you’ve updated your domain settings, DNS propagation will take 24-48 hours to complete. You may not be able to access your site using your domain during this time. However, our article How to access your web site before DNS propagation shows you how to access your web site using a hosts file.
FTP and SFTP
Secure Shell File Transfer Protocol (SFTP) is available on all unmanaged VPS hosting accounts. This method is more secure than traditional FTP, as it utilizes SSH protocol to encrypt file transfers. Most FTP clients support SFTP. Our article Using FTP (File Transfer Protocol) covers FTP basics, while our article How to use FTP with Linux hosting accounts demonstrates how to use an FTP client and connect to your account.
Need help getting off the ground?
Do you have any questions about your account? We are here 24/7 to help! We have a support page where you can search the A2 Hosting Knowledgebase, submit a Support ticket, give us a call or chat live with one of our Guru Crew team members. Visit our Support page now if you need assistance:
Article Details
- Operating System: Linux Hosting
- Product: Unmanaged VPS
- Level: Intermediate
Grow Your Web Business
Subscribe to receive weekly cutting edge tips, strategies, and news you need to grow your web business.
No charge. Unsubscribe anytime.
Did you find this article helpful? Then you'll love our support. Experience the A2 Hosting difference today and get a pre-secured, pre-optimized website. Check out our web hosting plans today.
